Openpipe breakout
UPDATE (October, 1st 2012)!!! We’ve moved to www.openpipe.cc.
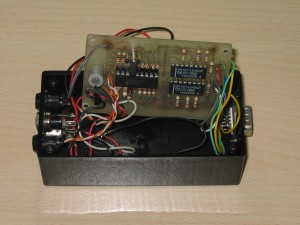
The past summer I discovered MPR121 Capacitive Sensor Controller searching cool stuff at Sparkfun and suddenly, mixed feelings came to my mind related to one of my past hobbies: mixing bagpipes and electronics.
Back in 2000 I developed a galician MIDI bagpipe chanter based on PIC16F84, and it was really funny.
In 12 years a lot has changed related to DIY electronics, especially related to Open Source Hardware, Arduino, etc., so I decided to give it a new try.
First thing to do was to test MPR121 capacitive touch controller, as I have related in a previous post.
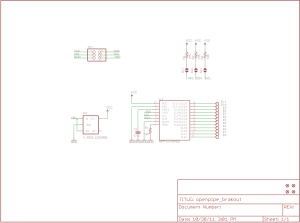
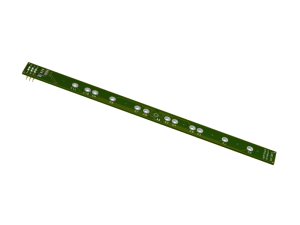
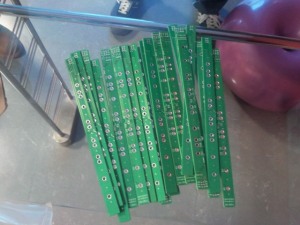
Then I decided to move on PCB design (Eagle) and manufacture (Eurocircuits) in order to learn the whole precess from a DIY approach. Based on SparkFun breakout board I designed a new PCB with flute finger layout.
The two layer SMD design was focused to Eurocircuits default technology.
There is only one new feature regard MPR121 breakout from Sparkfun, and It is the 3.3V regulator, in order to allow connecting with 5V boards.
The layout is quite simple. Finger pads are located this way to facilitate routing. Pull-up resistors have solder jumpers, in case you need to disable them.
Eurocircuits PCB service is easy, fast and “cheap”. I was really surprised how easy It was to manufacture the boards.
Next step is reflow. If you think you can solder QFN20 with a soldering iron… try it :).
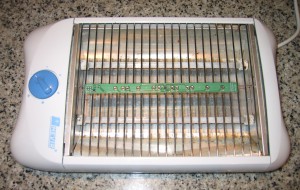
In order to reflow QFN20 I used soldering iron to put some tin over the pads, then I carefully located the IC over the pads and then I used a high-tech reflow station (a.k.a. toaster).
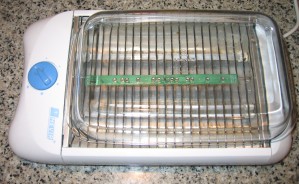
I covered the “reflow station” with a glass ovenproof dish…
And surprisingly It worked like a charm!!! Remaining SMD components was soldered by hand.
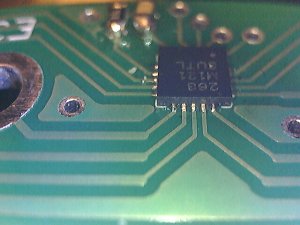
I was very happy with the toaster reflow station, but I wanted to improve a bit the assembly process, so I ordered a polyester stencil to http://www.smtstencil.co.uk/. Stencil works fine for all components except for QFN20. I can’t manage to put the needed solder paste so every reflow I get bad QFN20 connections. So I’m currently putting QFN20 tin by hand and using the stencil for the remaining components. The following image shows QFN20 after reflow.
The electronics is OK, now the mechanics…
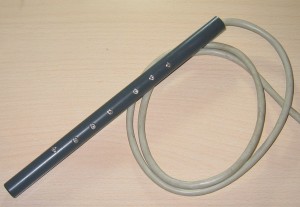
I soldered M3 hexagonal spacers to the finger pads. I used screws for testing.
Then I bought PVC pipe from a hardware store and made one 3mm hole for each spacer.
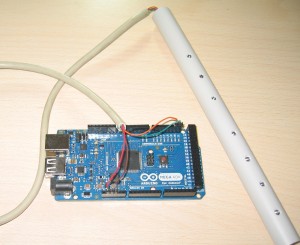
Some wires and the Openpipe breakout board is ready to connecto to Arduino using I2C.
The hardware is OK. What about the software?
I wrote an Arduino Mega sketch that reads MPR121 pads and uses PWM for sound generation. Quite simple and powerful enough for validation.
And here is the final result!!!
If you are interested in the Openpipe breakout please drop me a line to xulioc at gmail.com. I think I could manage to send you the “kit”.


I want one!
Pingback: Openpipe breakout « adafruit industries blog
How much for a “kit” I would love one!
This is really cool! Keep up the good work!
Very nice!
Very nice work!
Now, you must make an elbow-operated bellows-driven generator set to power your pipes!
Good point!
I’ve built (and am still building) a recorder myself, but I use the Arduino CapSense library, so all I need are resistors which were easier to come by than the MPR121. That doesn’t mean that the chip is difficult to obtain but the resistors were simple right there. I also use an Arduino Pro Mini which fits into the corpus to keep the wiring short, and out goes MIDI.
Apart from that … nice work and playing!
Hi Stephan,
The CapSense option is much easier than MPR121, sure 🙂
The benefits of the MPR121 is that you have an IC that is supposed to do the capacitive sensing task better than arduino because is designed for that (power consumption, etc.). You can also extend the number of electrodes despite of the arduino free pins.
Good job. What is the availability of the kit and the cost.
I created a MIDI Arudino based concertina that worked with a four buttons bread board prototype. The code got too complicated when I tried to expand it for the full 30 switches I wanted on the real concertina. You have inspired me to get back to the coding and solve my problems.
Hi Robert, all,
I’m happy because I’ve reactivated the concertina project 😉
Is the concertina interface tactile?
With MPR121 you could connect up to 4 (48 electrodes) in the same I2C bus, because it has 4 different configurable address.
The OpenPipe breakout kit is home-made. I could send you one for 30€ plus shipping.
-Assembled openpipe breakout
-Standoffs
-Screws
-PVC pipe with holes
My concertina uses snap action micro switches. Not the best solution but it was an easy solution but hard physically to play.
I would like to buy the OpenPipe breakout kit for 30 Euros. Can you include a schematic for connection to an Arduino and connections of the speaker. Is there any other electronics required, like a amplifier, power supply beyond the Arduino? I may convert it to MIDI.
Hi there,
Found your video on Youtube and I’m quite impressed with it. Interested in the kit, but I have some questions. Do you have an email I could contact you at?
Thanks
Hi!
You can contact using xulioc at gmail.com
Hello, I am interested in the instrument.
¿Se can put any soundfont?
can be put to work a grunt of accompaniment (type bagpipe)?
is midi controller?
works only or requires a pc? as we do for sale?
I am in Spain, in Barcelona.
I`m not speak English, but I have used a greeting traductor.
Pingback: OpenPipe breakout MIDI over USB with Arduino « Ferraganchos & Pinchos
Pingback: OpenPipe Breakout & Arduino Musical Shield « Ferraganchos & Pinchos
I assume bagpipe fingering? How easy would it be to redo this for recorder fingering? 32 positions/combination or notes would be required?
Hi!
Currently, the sketches use Galician bagpipe fingering, but you could update the fingering table in order to match your instrument.
You need to provide for every note the finger position (open or closed) and the ones that does not care.
Take a look at the code and ask if you need additional info.