MPR121 capacitive keyboard with Arduino Mega
UPDATE (October, 1st 2012)!!! We’ve moved to www.openpipe.cc.
I’ve got some MPR121 breakout boards from SparkFun in order to test latency and play a bit with this IC.
The setup is quite simple: eight drawing pins on a breadboard connected to the MPR121 breakout.
Then connect power and I2C signals to Arduino Mega. Be sure power is 3.3V because MPR121 is not a 5V IC.
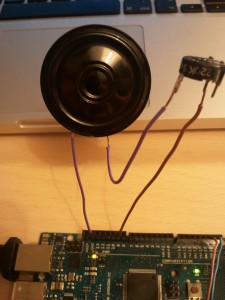
I’ve attached a 16 Ohm speaker to PWM output (PIN 9 lower, PIN10 higher).
And here is the result.
And here is the code: http://dl.dropbox.com/u/196184/mpr121.zip. Use at your own risk 😉
Code is based on:


Pingback: Openpipe breakout « Ferraganchos & Pinchos
How would the code be needed to change if you dont want to make music with the input of the 12 data sensors but instead save them on an openlog chip?
tks
Hi Christian!
I’ve never used openlog, but as far as I understand the openlog logs serial data, and the MPR121 has an I2C interface, so you need something in between the MPR121 and the openlog to read data from MPR121 using I2C and send to openlog in using serial protocol.
In case you are planning to use an Arduino in between, then the code change is easy. Instead of changing the PWM value for generating the sound simply write the message you want to log with Serial.print() and connect the openlog to Arduino serial interface.
Hope it helps!
Thanks!
Indeed i plan to use an arduion in between. How would you change this PWM value with write the message logging with serial.print()? Like what should be written in the void setup() below the data works to be written on an sd card for data logging?
(Code:)
void setup()
{
Serial.begin(9600);
// PWM SETUP
//http://www.arcfn.com/2009/07/secrets-of-arduino-pwm.html
//Varying the timer top limit: phase-correct PWM
pinMode(9,OUTPUT);
pinMode(10,OUTPUT);
TCCR2A = _BV(COM2A0) | _BV(COM2B1) | _BV(WGM20);
TCCR2B = _BV(WGM22) | _BV(CS22);
OCR2B = 10;
// MPR121 CONFIG
Wire.begin();
mpr121QuickConfig();
touch_previous=0;
}
Tks a lot before
Hi there,
Quick question- how close do you think you could get the wires/touch pads before they would interfere with each other? I’d like to create a high resolution touch pad like device, but I am worried that I couldn’t insulate the wires well enough or get the sites as close as I need them to be.
Thanks,
Drew
MPR121 has a lot of settings, so you can adapt the capacitive response to you needs, defining ON/OFF thresholds according to your setup.
Hope it helps!
Xulio.